
How to Make a Cheeseboard
Learn how to make a Cheeseboard loaded with cheese, cured meat, and other delicious bites. I’m sharing my tips for the best cheeseboard, including the best base to use and how to pick the ingredients. Make it, and it will be the star of the holidays!
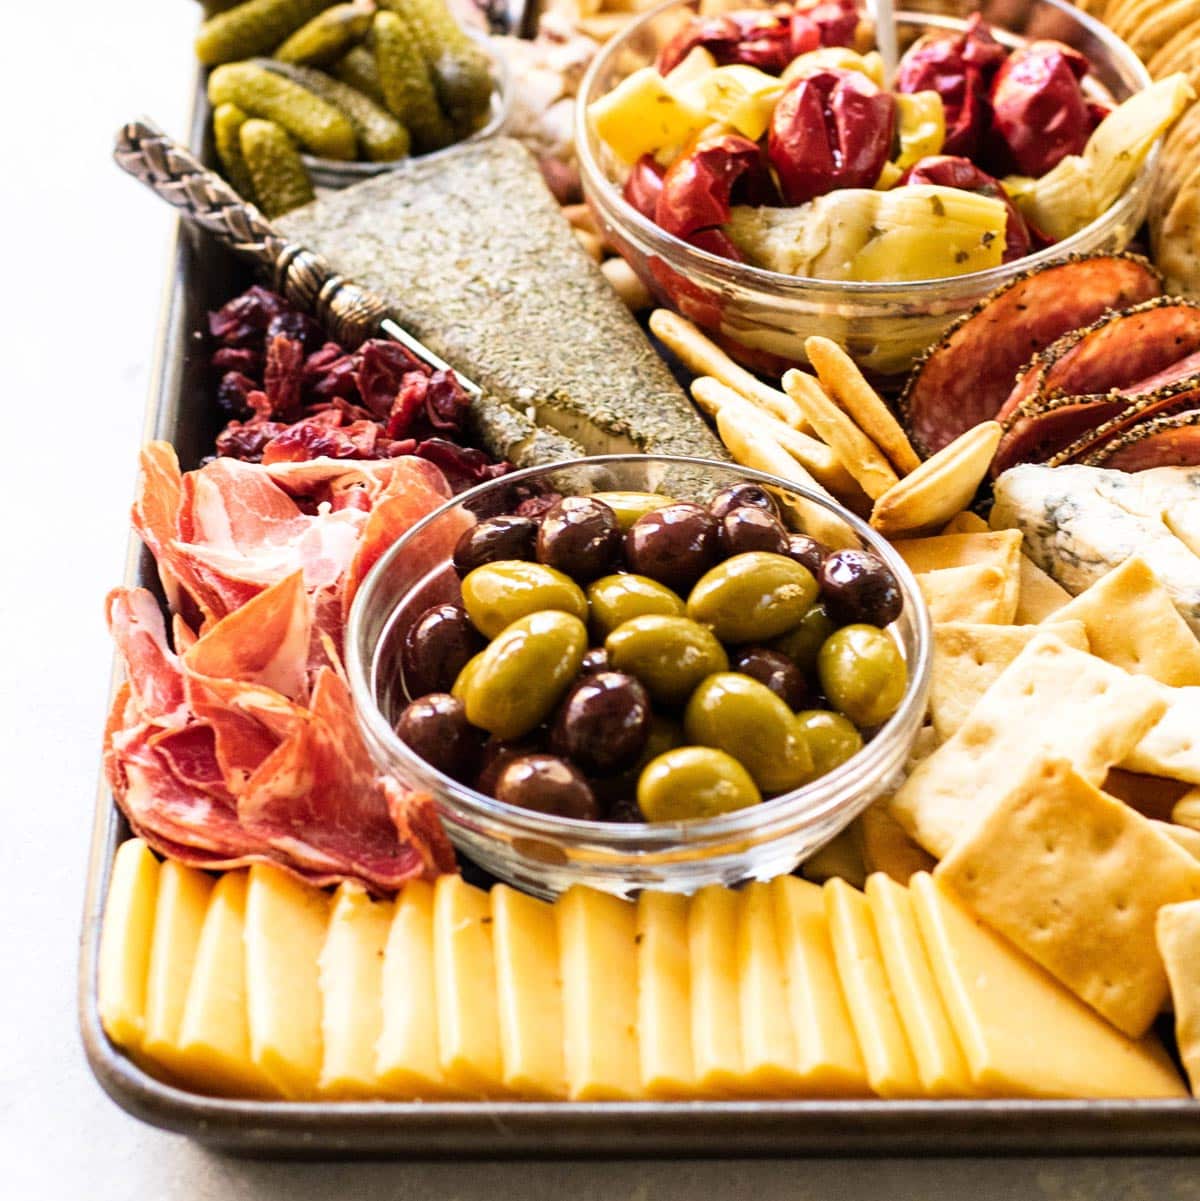
Table of contents
With the holiday season approaching, I’m starting to think about all the holiday snacks and treats. One of my favorites is a classic cheeseboard – there is no easier way to impress guests than with a big charcuterie/cheese board filled with delicious bites.
There’s no cooking required, and with a few tricks up your sleeve, you can assemble and serve a beautiful platter that will leave people wondering who you hired to put the whole thing together. It’s also easy to scale up or down depending on how many people you want to serve.
It’s the perfect centerpiece for your holiday get-together. So, consider this your guide to the ultimate holiday cheeseboard. Let’s get started!
Plan Your Cheeseboard
The key to success in any endeavor is planning, and taking a few minutes to make a list before you hit the store will help ensure you end up with a cheese board that’s not only beautiful to look at but filled with a variety of colors, textures, flavors, and shapes.
These days even the most mainstream grocery store has a specialty foods section filled with lots of choices, so don’t feel like you need to scout out some distant gourmet food store to source your items.
Most likely, you’ll have plenty of choices for your cheeseboard, so here are some things to keep in mind…
Cheese
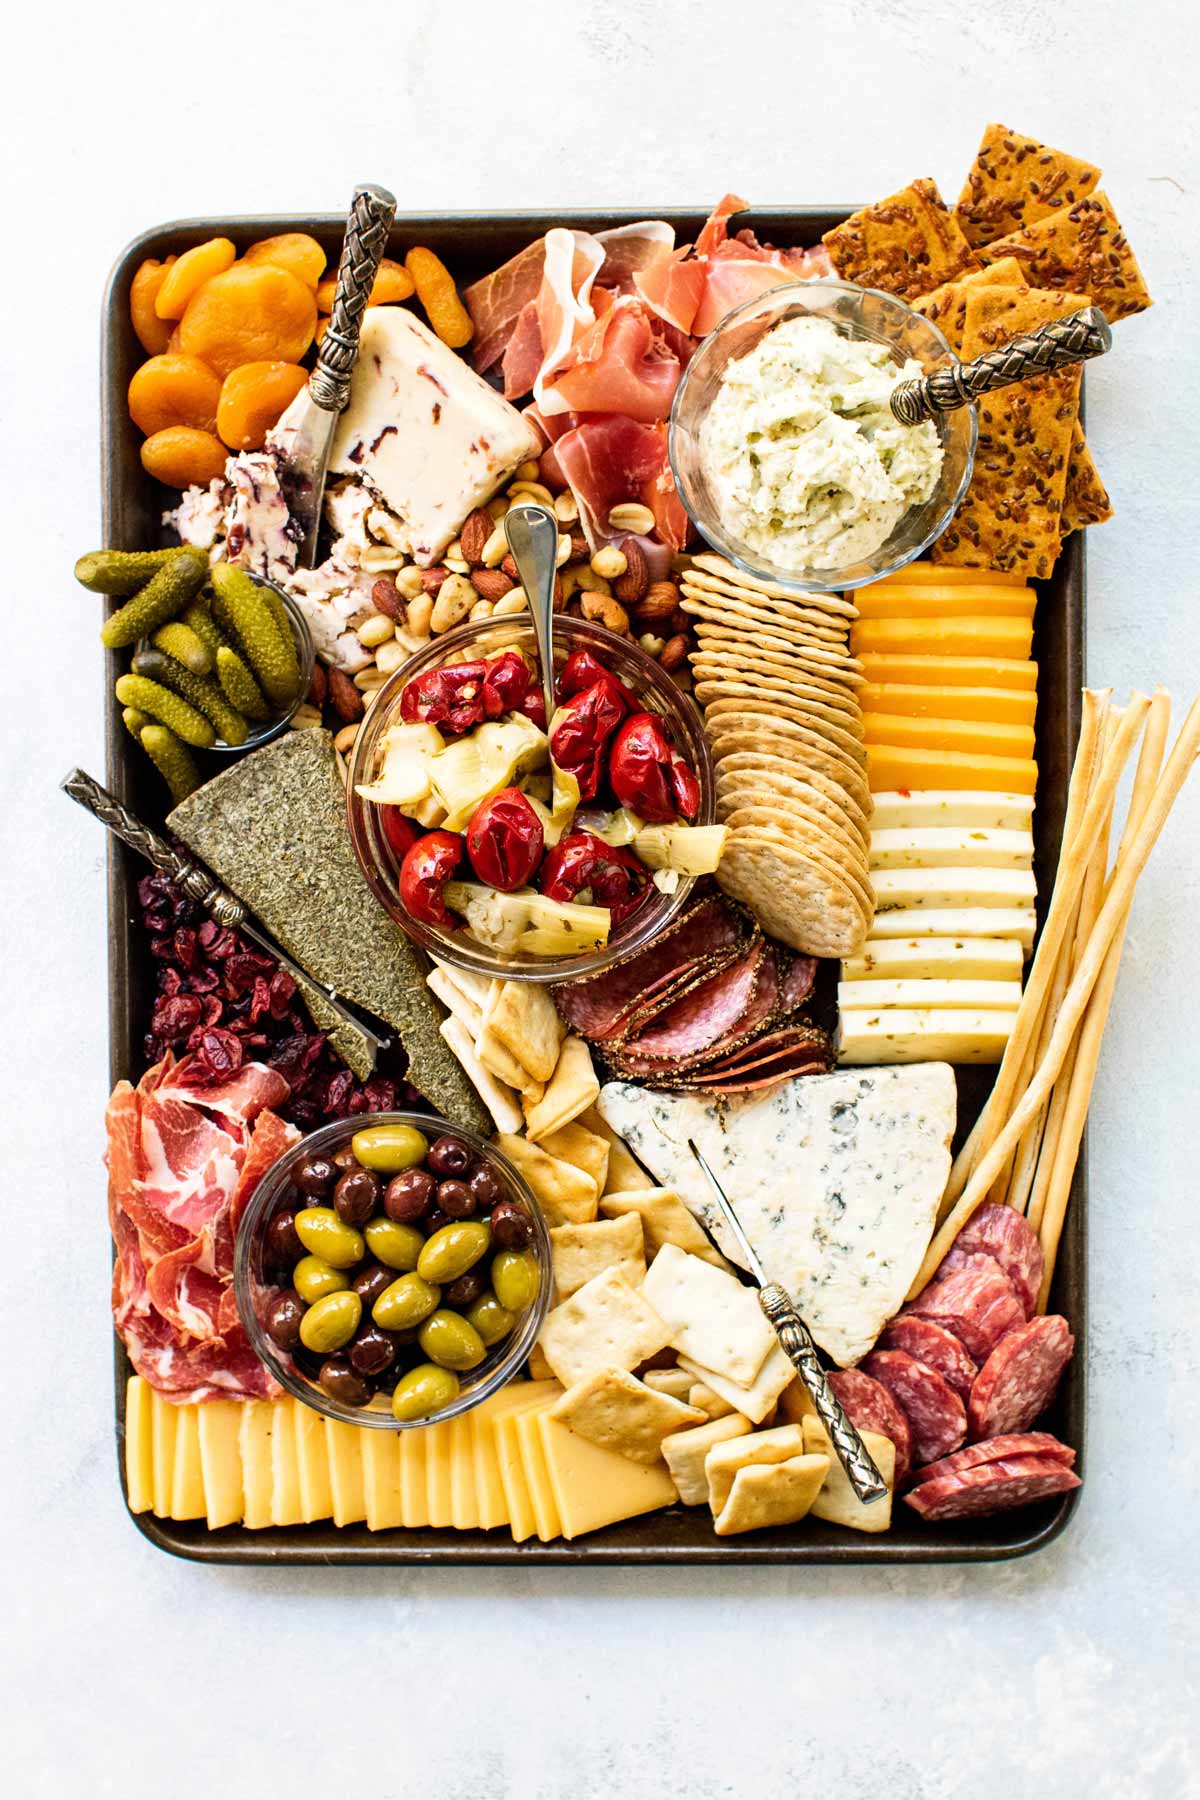
Pick a few different kinds of cheese with different shapes and textures, like hard cheese, soft cheese, and a few in between. A few wedges, a creamy, spreadable cheese, and bite-sized sliced cheese give everyone a few choices.
I choose a variety of cheese – for this particular board, I used Wensley Dale with Cranberry, Cheddar and Roasted Garlic Cheese Spread, Rosemary Topped Goat Cheese, Gorgonzola or Roquefort and a variety of sliced cheese.
Crackers
I like to include crackers that not only vary in shape but also flavor. I love a classic water cracker, but including different colors and flavors keeps things visually interesting.
Use enough crackers to fill the nooks and crannies (more about how to arrange everything coming up!) and refill as needed. I used Red Pepper Sesame Crackers, Water Crackers, Small Square Crackers, Thin Crunchy Bread Sticks
Cured Meat
A few different types of cured Italian meat like prosciutto and hard salami are little savory surprises tucked in among all the cheese and crackers. Look for different types in the deli section or specialty cheese area at your grocery store. You may find a variety pack that includes a few different options. I chose Proscuitto, Genoa Salami. Coppa and Hard Salami.
Marinated Snacks
A lot of stores have olive bars now where you can pick out all kinds of tasty treats that add a pop of bright flavor to your cheeseboard.
If your store doesn’t have an olive bar, check out the aisle where the pickles are – jarred artichoke hearts, roasted red peppers, sun-dried tomatoes, and stuffed olives are all great additions.
Fruit and Nuts
Fruit and nuts (think almonds, walnuts, and pecans) are a nice way to fill in the little spaces on the board. Dried apricots and cranberries along with some roasted mixed nuts are a great choice.
If you opt for fresh fruit, avoid anything that will brown like sliced apples or pears. Grapes and fresh berries would work better.
Tips for Making a Cheeseboard
Once you have all the components for the cheese board it’s time to get creative. It doesn’t take long to put it all together…
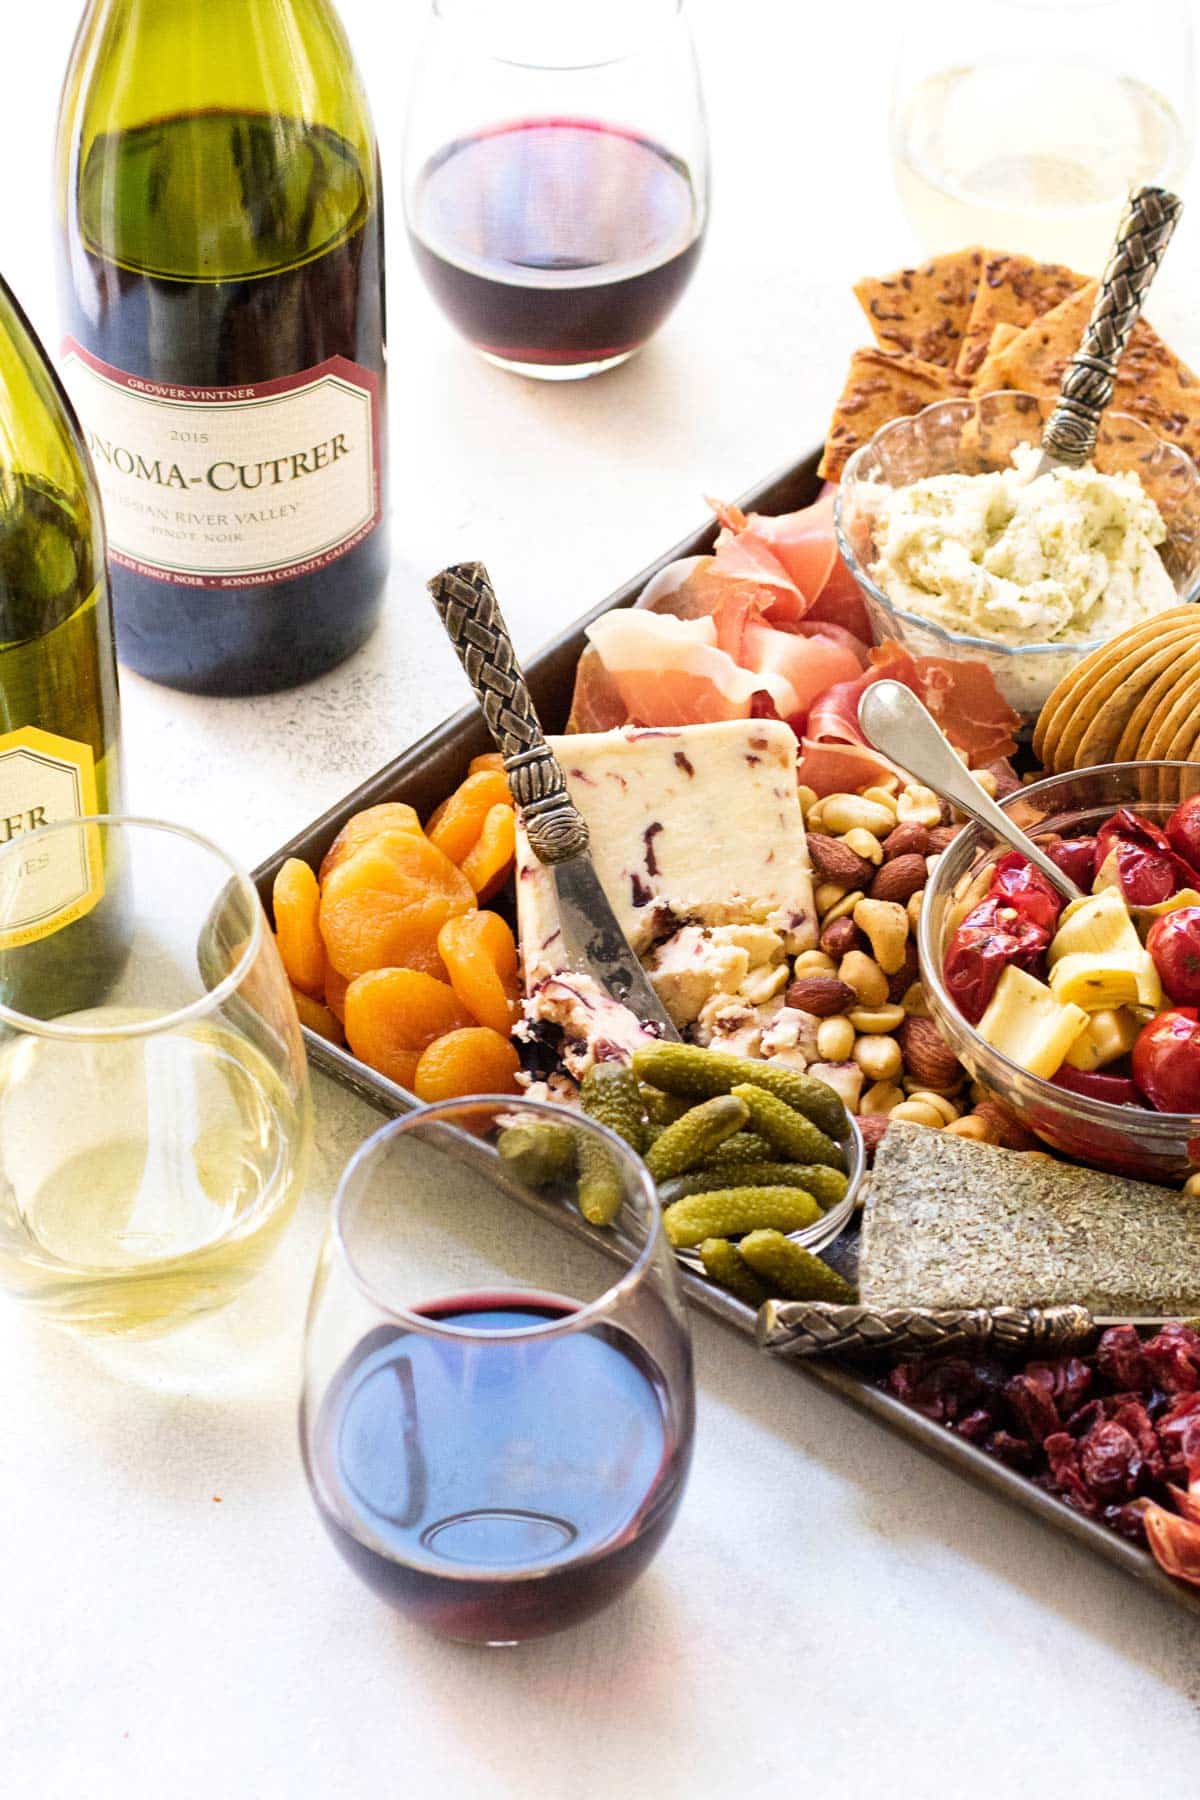
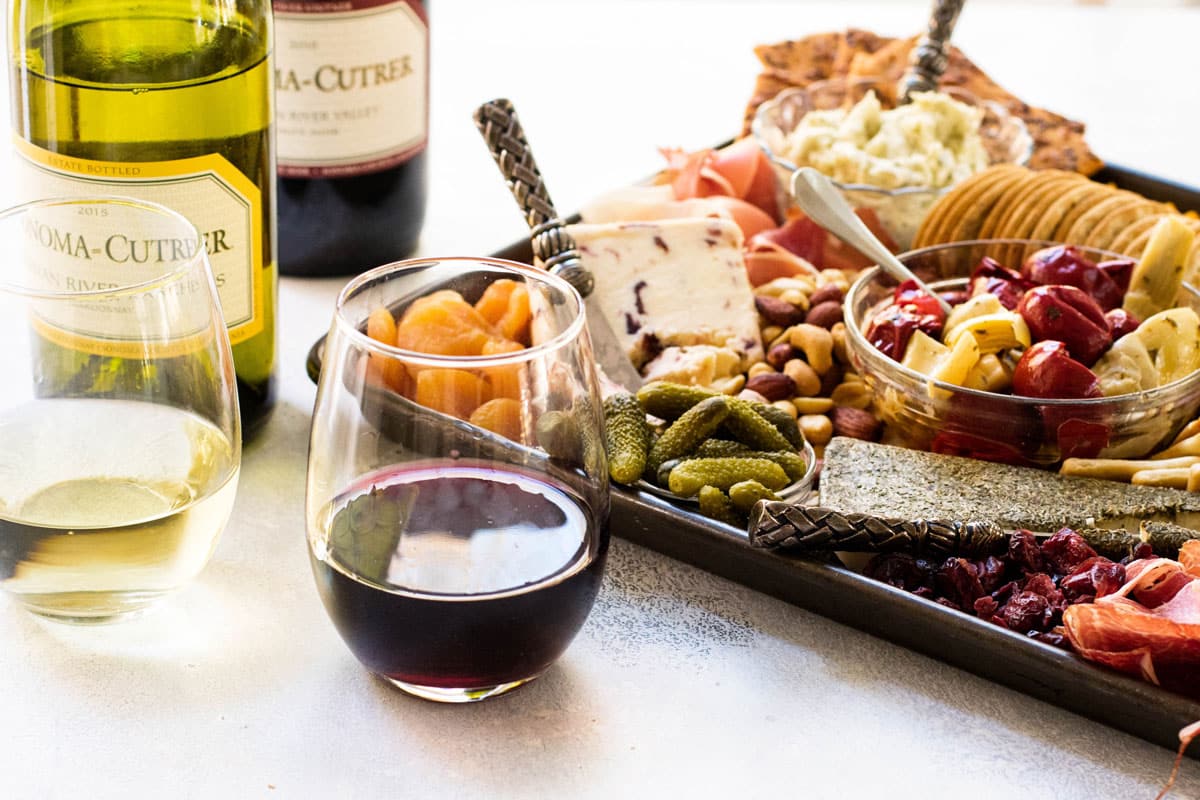
- Pick a Base: If you already have a large slate, wooden cutting board, or large platter, by all means, use it, but I find a simple rimmed sheet pan makes a great base for a cheeseboard. It keeps everything contained (no fear of anything falling off the edge) and it’s easy to move the cheese board around. Parties have a tendency to change locale transitioning from the living room to the kitchen and using a sheet pan makes it easy to move the cheese board from spot to spot.
- Cheese knives: These little knives make it easy to slice or spread the different kinds of cheese. Little spoons work well for any spreads.
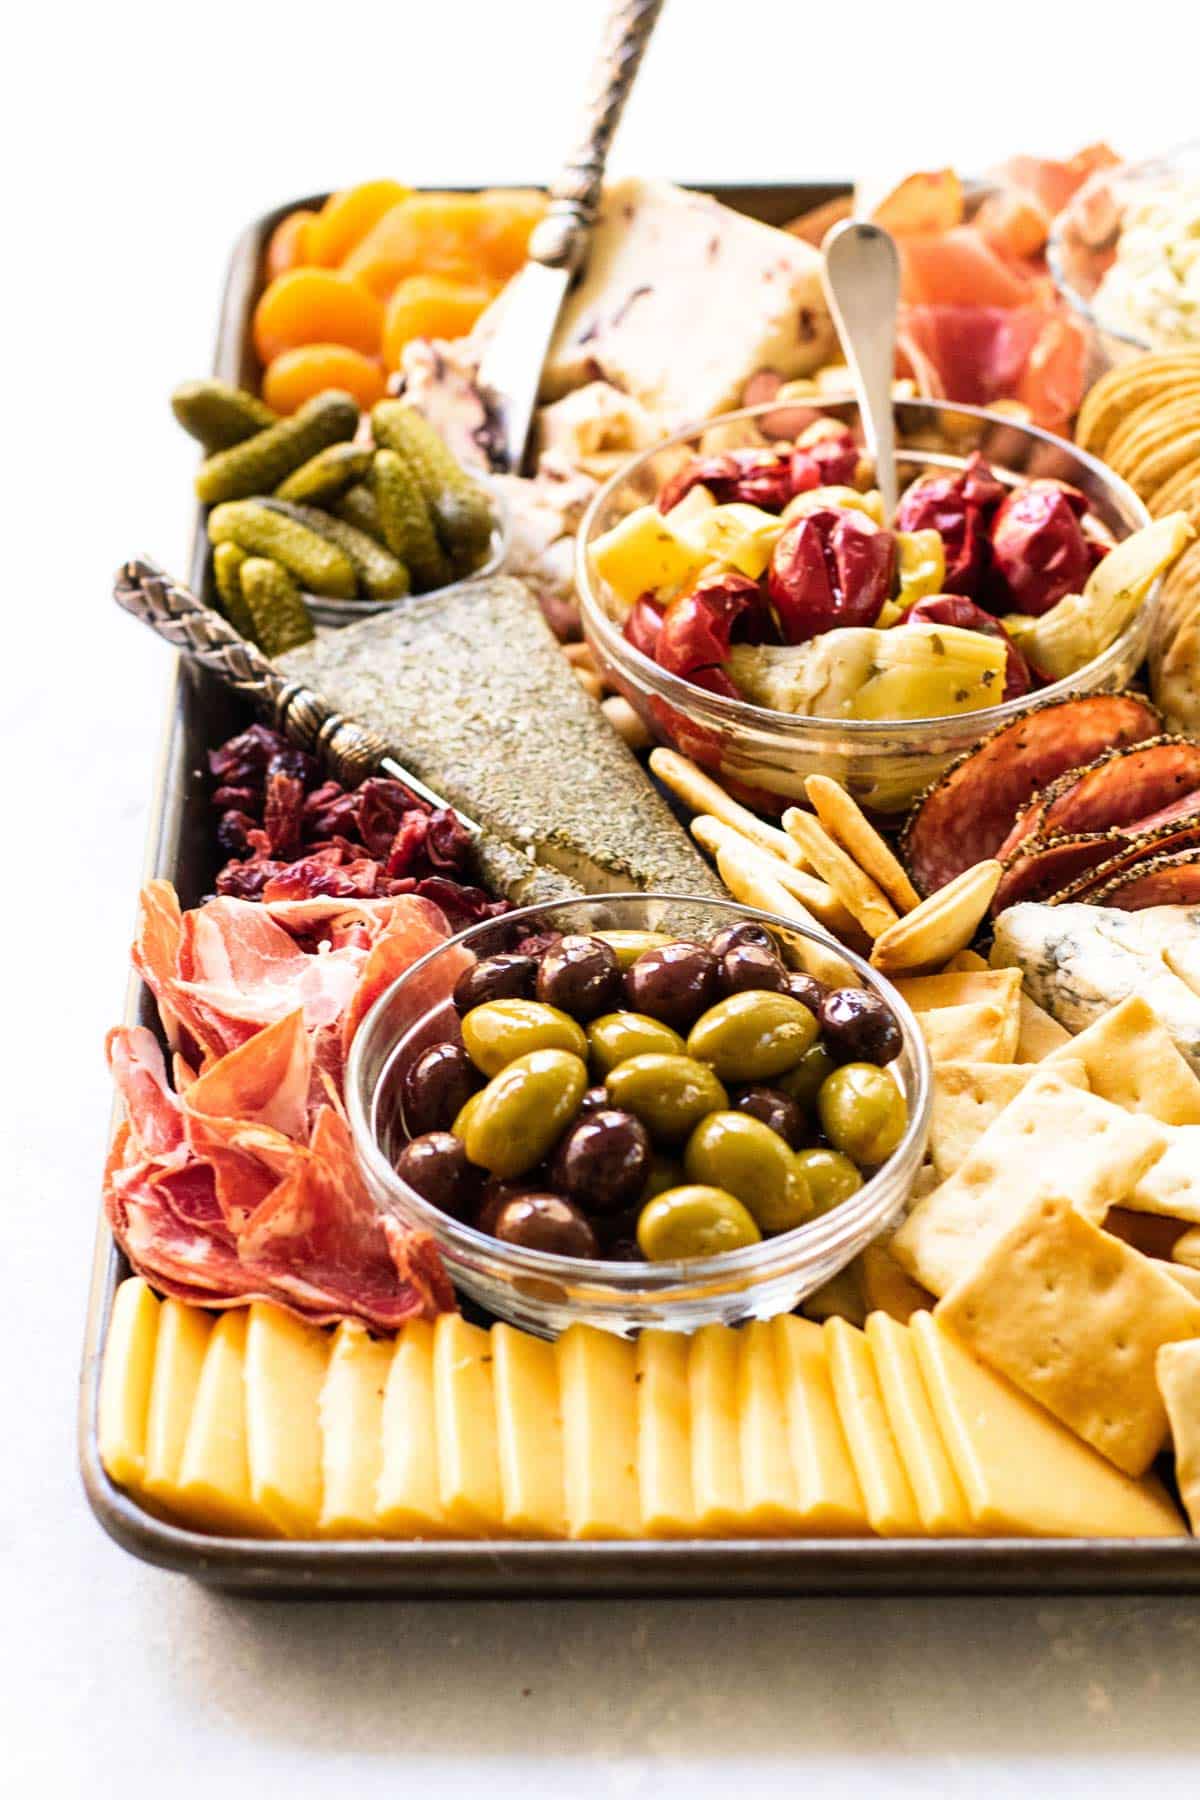
- Start Big: Building a cheese board is like arranging flowers. Start with the big stuff first like anything that needs to be held in bowls followed by the big wedges of cheese. Place them spaced apart leaving room to fill in spots with everything else.
- Stack and Line: Next, position the sliced cheese along the edges of the sheet pan making it easy for people to grab a slice. Depending on the type of crackers you use, stack and line some of them up, too.
- Tuck It: Fill in spots with the cured meat, but it’s a good idea to hold some back and refill as necessary. Things like salami and prosciutto hold well at room temperature for a while but have a tendency to get a little greasy if left out too long. Keep the extras in the refrigerator and add more as they disappear.
- Fill In: Use the nuts and dried fruit to fill in the little nooks and crannies after everything else has found a place on the board. Small crackers work well for this, too.
- Other add-ins: Little bowls of honey, jam, mustard, or other spreads you like with cheese and crackers are great, too!
And that’s it! Just open the wine and let the merriment commence.
Happy cheeseboard making,

More Appetizers and Snacks
📣 Do you love this recipe? I would love to know! Leave a comment below the recipe along with your recipe star rating.
PrintHow to Make a Cheeseboard

Learn how to make a Cheeseboard loaded with cheese, cured meat, and other delicious bites. I’m sharing my tips for the best cheeseboard, including the best base to use and how to pick the ingredients. Make it, and it will be the star of the holidays!
- Prep Time: 20 minutes
- Total Time: 20 minutes
- Category: Appetizers
- Method: No Cook
- Cuisine: American
Ingredients
- 1 to 2 kinds of soft cheese: Spreadable cheese like beer cheese, creamy goat cheese, brie, or other containers of soft cheese.
- 1 to 2 kinds of sliced cheese: Cheddar, gouda, pepper jack cheese, or Colby jack are all good options.
- 2 wedges of cheese: Gorgonzola or another type of blue cheese or look for wedge cheese made with dried fruit.
- 4 different kinds of crackers: Pick a variety of shapes and colors. Water crackers, butter crackers, crunchy breadsticks, and sesame crackers all work well.
- 3 to 4 different kinds of cured meat: I love prosciutto, hard salami, and other Italian-style cured meat are delicious.
- 2 to 3 different kinds of marinated snacks: Add some stuffed olives, artichoke hearts, roasted red peppers, sun-dried tomatoes, or cornichons. Be sure to drain them well before adding them to your board. I think it works best to place them in a bowl so they don’t get the other components wet.
- 2 to 3 kinds of dried fruit and nuts: Any kind of roasted nuts and dried fruit like apricots and cranberries are a good way to fill in gaps on the board.
Instructions
- For a large cheese board, a rimmed sheet pan works great. It keeps everything contained and is easy to move around if the party moves from the kitchen to another room.
- Start by placing the large items first. Anything in a bowl and the cheese wedges.
- Place the crackers around the big items. Large ones can be fanned out and small crackers can be piled. If you have large crackers or breadsticks, place them in a corner of the board so they don’t take lots of room.
- Arrange the cured meats by folding them or piling them in open spots on the board.
- Take the dried fruit and nuts and pile them in the rest of the open spots. They work well in corners or in between bowls and cheese wedges.
Post updated from the archives. First published in Dec 2017.
I think I will just skip big meals and make this! Has all my favorites. Thanks for sharing.